360 images using Cinema4D
How to create panoramic renders from Cinema4D?
For creating a 360 render using Cinema4D, we have created a quick tutorial that shows you a step-by-step guideline.
- Create a Camera, as explained on the other tutorials, the first is step is always creating a Camera.
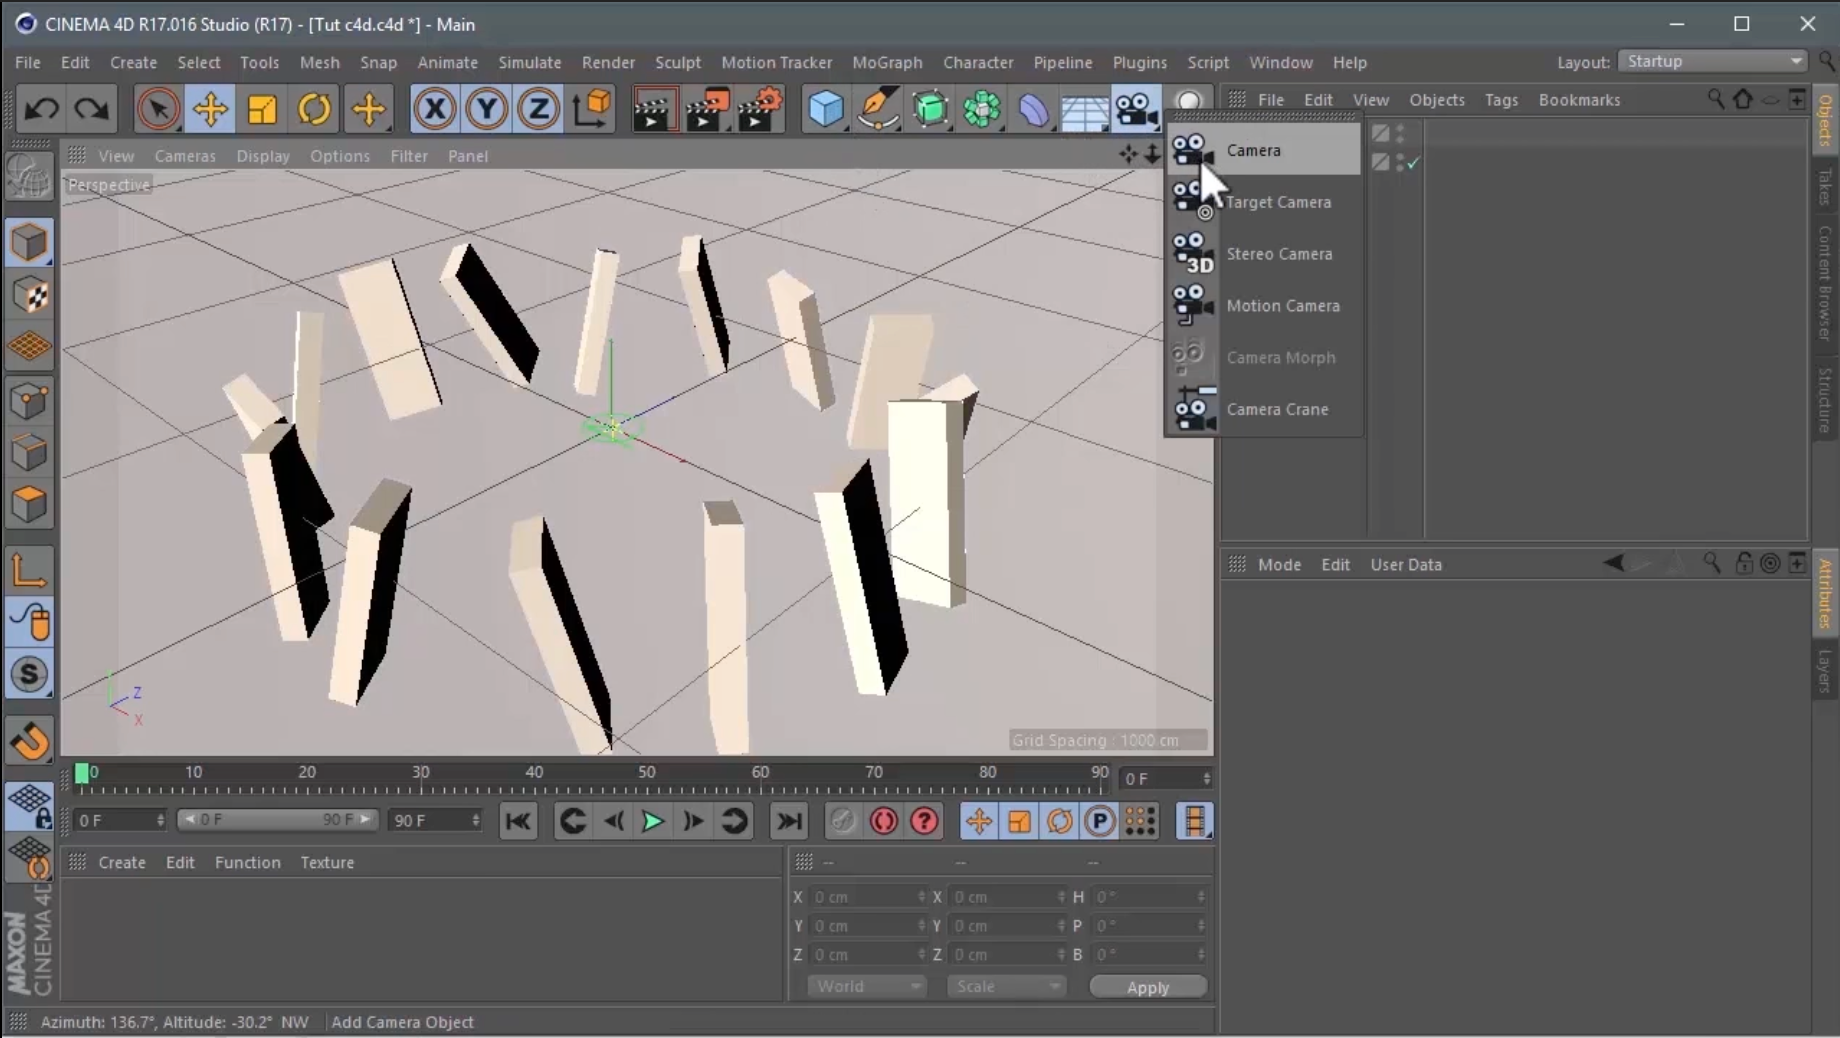
To simplify the explanation, we'll do it with a simple camera. In the future, you can use any of the available cameras.
- The next important step will be to *Adjust the Coordinates.
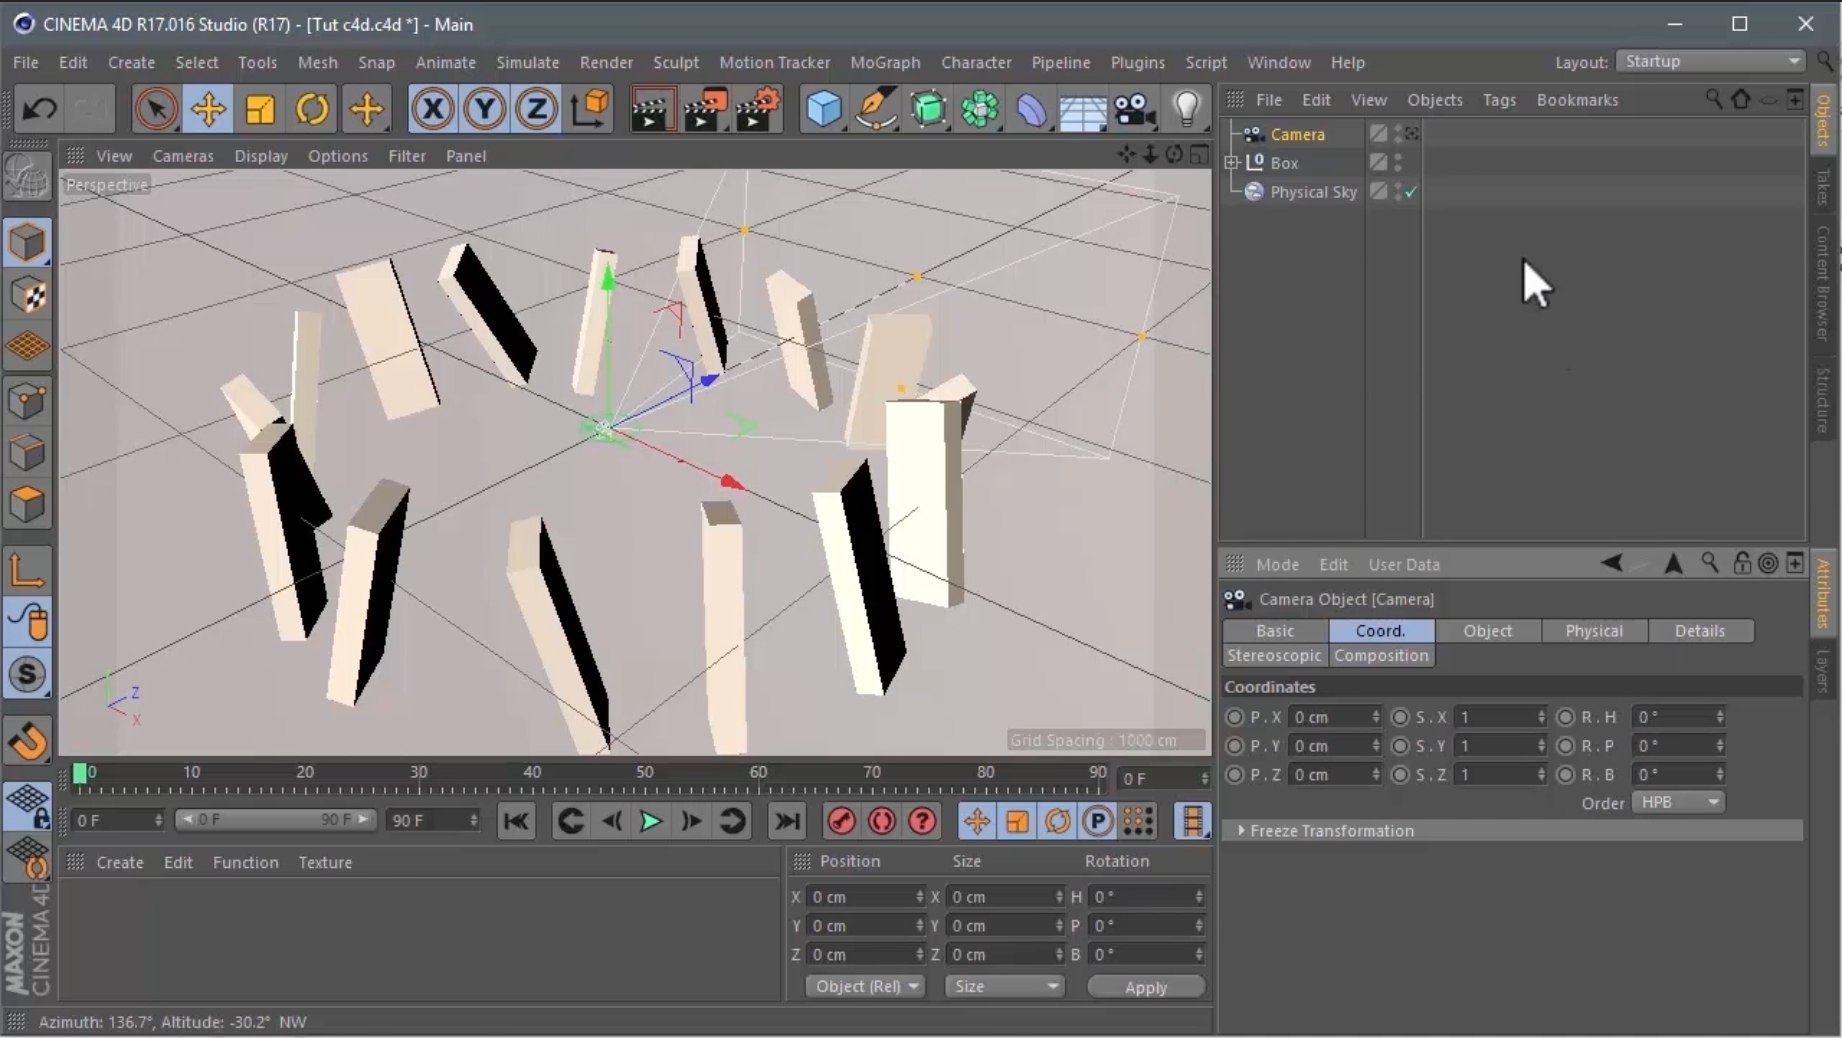
You'll can always change the position, which will depend on each project, but at least the rotation have to be all set at 0.
- Now its time to Adjust the distance of the Camera* by doing click on Object and then changing the **Focal Lenght. We recommend changing it to 15.
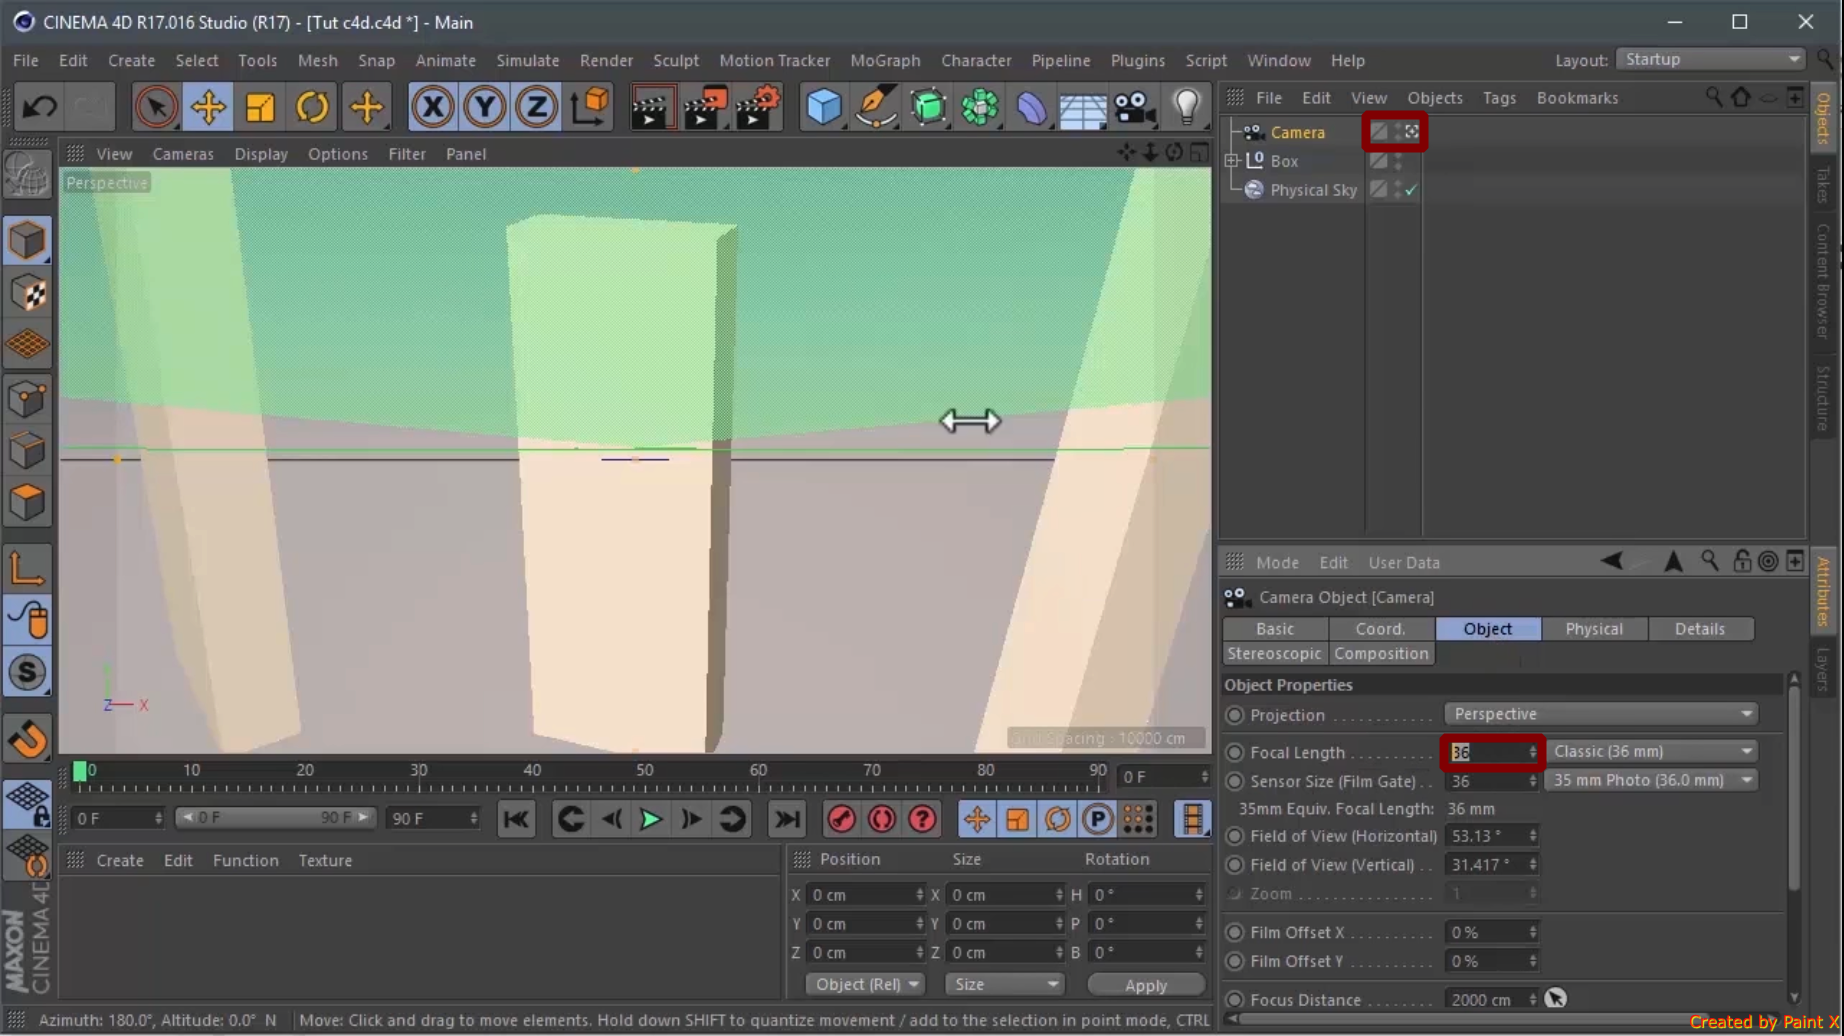
For this, it's important to select what the camera is watching, clicking on the second square at the right side of *Camera
- Now it's time to *Render by clicking on the icon showed in the picture.
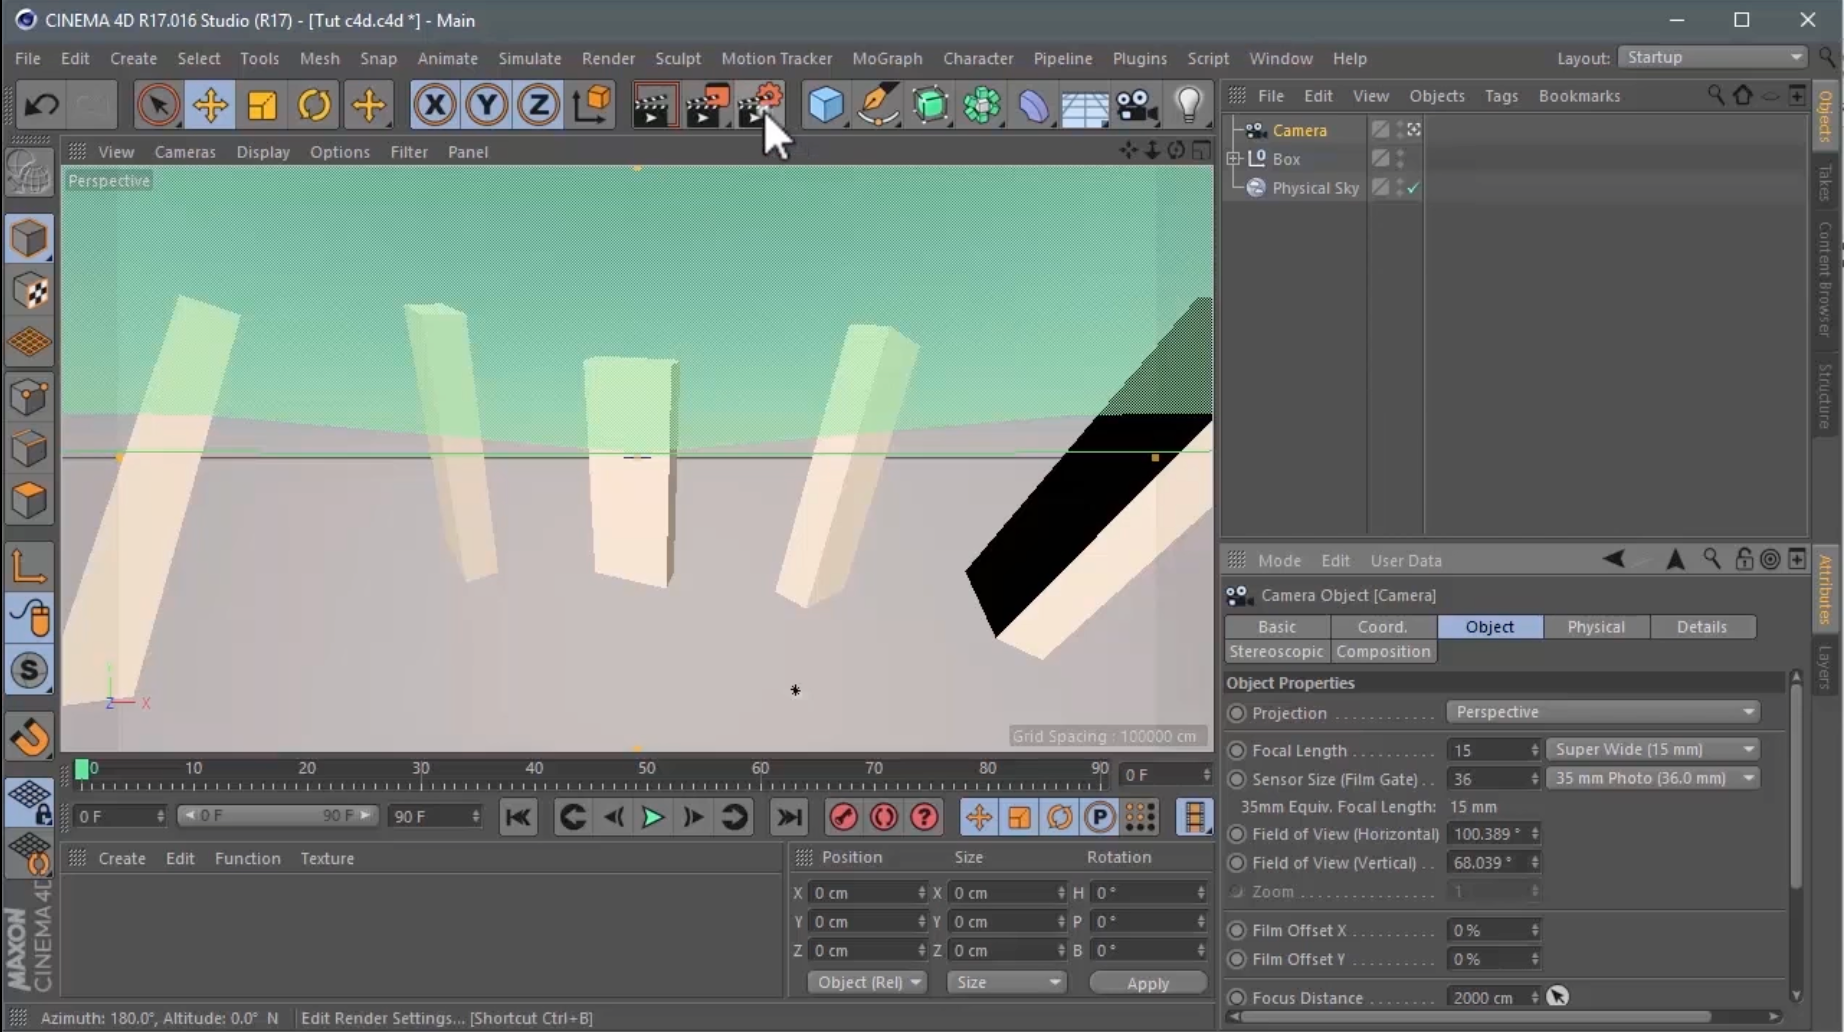
- After clicking on Render, a new window will show up, *Rendering Settings:
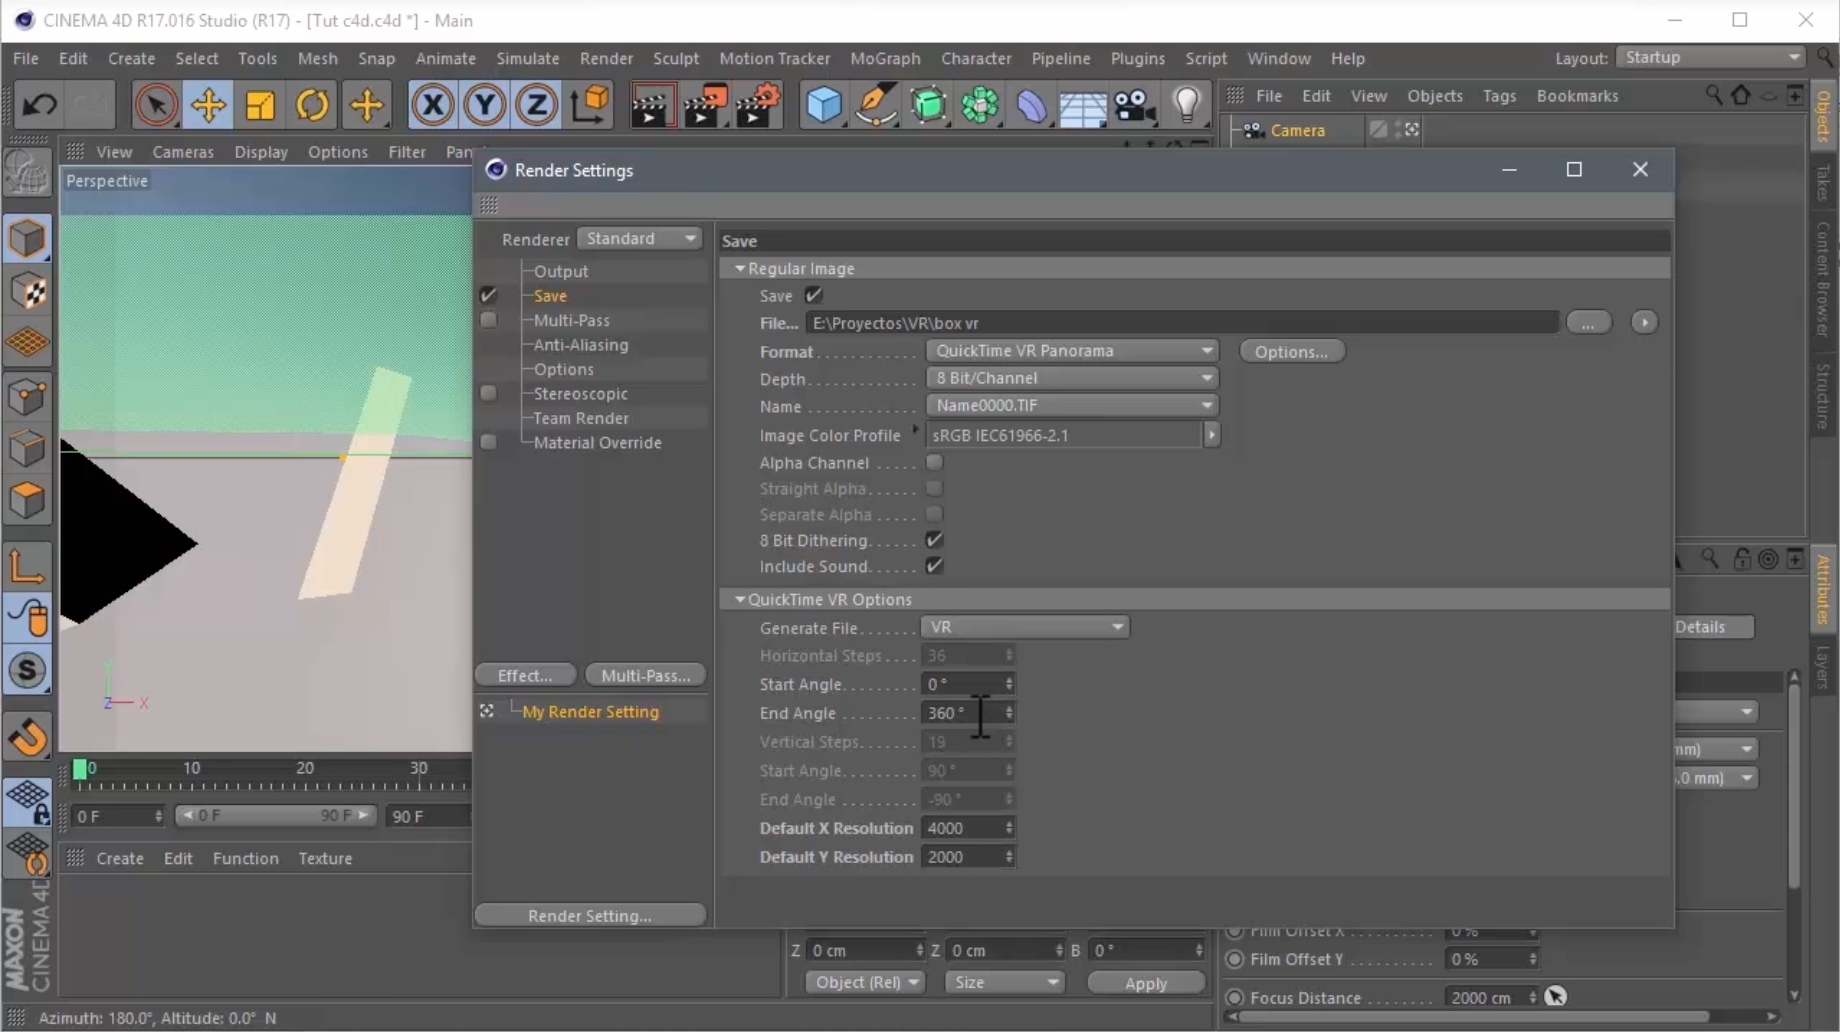
Select "Save" and choose as format "Quicktime VR Panorama" and change the resolution to [X:Y] [4000:2000] which is the highest resolution supported by SentioVR.
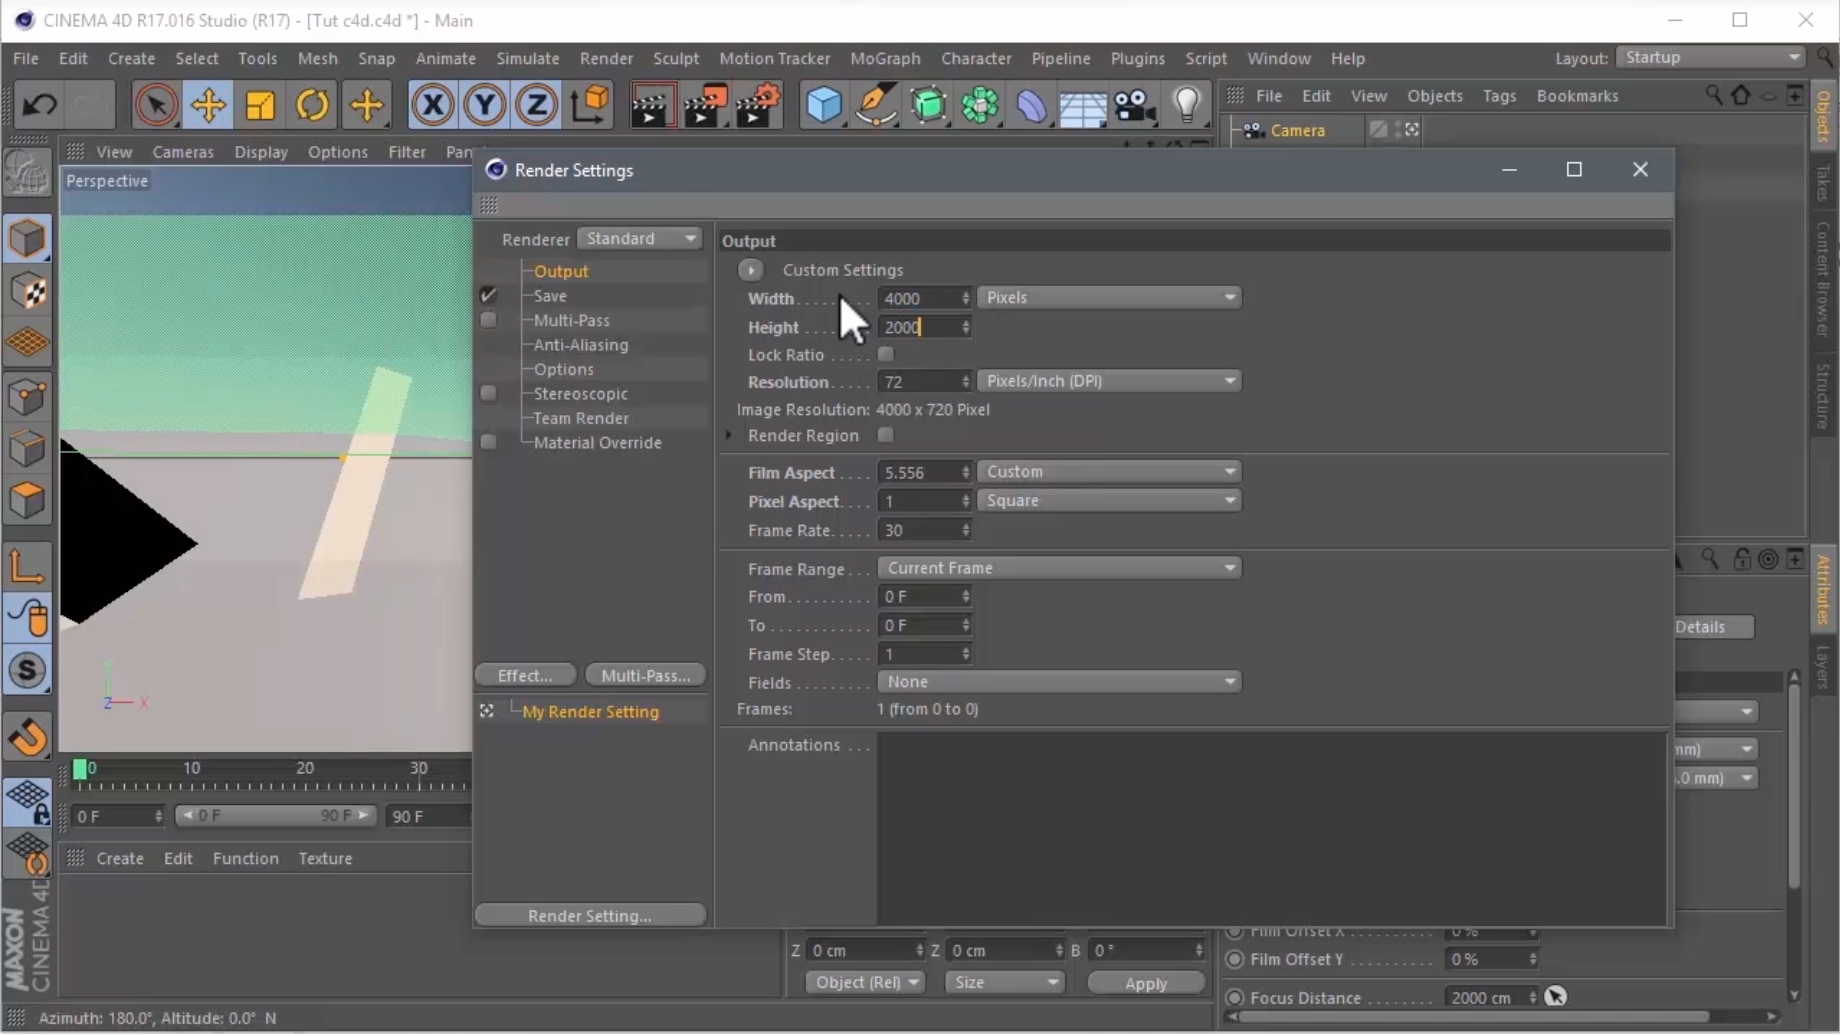
On the same window, select on "Output" and change the resolution again to [4000:2000]
- Close the Rendering Settings and click on Render as showed on the left picture. The rendering process will start, and will give as an output a .MOV file which you'll need to save as .JPEG to upload it to SentioVR.

Now you are ready to go INMERSIVE!
Your 360 render is ready for upload and creating a VR walkthrough !
You can also watch our Video!
Updated 12 months ago
