
360 images using 3DS Max
How to create panoramic renders from 3DS Max ?
For creating a 360 render using Autodesk 3DS Max, we have created a quick tutorial that shows you a step-by-step guideline. This tutorial will teach how to render on 360, once after you have set lights & textures, and you are sure how you want your render to look like. It will work for both outdoor and indoor tours with the default rendering settings, through V Ray, Default Skyline, Mental Ray, Octan, and every rendering engine.

Click on the image to download this sampler!
When rendering on 360, the first step that you will have to take is to position cameras.
Positioning Cameras: Select what kind of camera do you want to use.
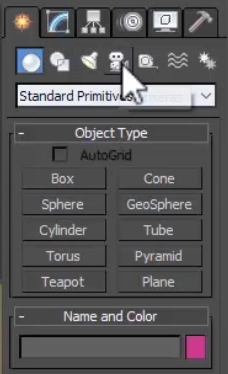
No matter what kind of camera you wish to use -Target, Physical or Free-, these steps will work for any of them.

*No matter what kind of camera you wish to use -Target, Physical or Free-, these steps will work for any of them.
Position the selected camera on the area of your 3D Model that you want to render.
In this step is important to consider the height which is relevant for your rendering goal, and how the size of your camera relates with your model. For that you will need to go to Camera Settings and play with options meanwhile doing a preview of your model.


Make sure that your Camera is selected, click on Utilities, More and select Panorama Exporter.


Select Panorama Exporter

Click on Render

Render Setup Dialog will set up, there, make sure your Camera is selected and configure the size of the render. We recommend you to render 4000*2000 pixels

In case, you are using a rendering engine like V Ray, on this windows you will also have to configure its functions.
Click on Render. A Panorama Exporter Viewer will show up, where 3DS Max, will generate a .mov file, which you will have to export to Sphere.

A Spherical Map output File window will appear. Save your spherical output as .JPEG on your local files.

- Your 360 render is ready for upload and creating a VR walkthrough !
Make Incredible Presentations in Virtual Reality
Updated 6 days ago
What’s Next
Create your account free on SENTIO VR